In today’s visually-driven world, a stage is no longer just a platform; it’s a powerful marketing asset. This comprehensive guide explores the principles and practices behind creating unforgettable, camera-ready environments. We delve into strategic photogenic stage design ideas that not only set the perfect tone but are also engineered for maximum social media impact. For event planners, brand managers, and marketing directors, this article provides a roadmap to transform any space into a shareable experience. We will cover the entire lifecycle, from initial concept to final execution, focusing on measurable KPIs such as a 300% increase in user-generated content, a 15-point lift in Net Promoter Score (NPS), and achieving a project budget variance of less than 5%. Our goal is to equip you with the knowledge to commission designs that are beautiful, functional, and deliver a quantifiable return on investment.
Introduction
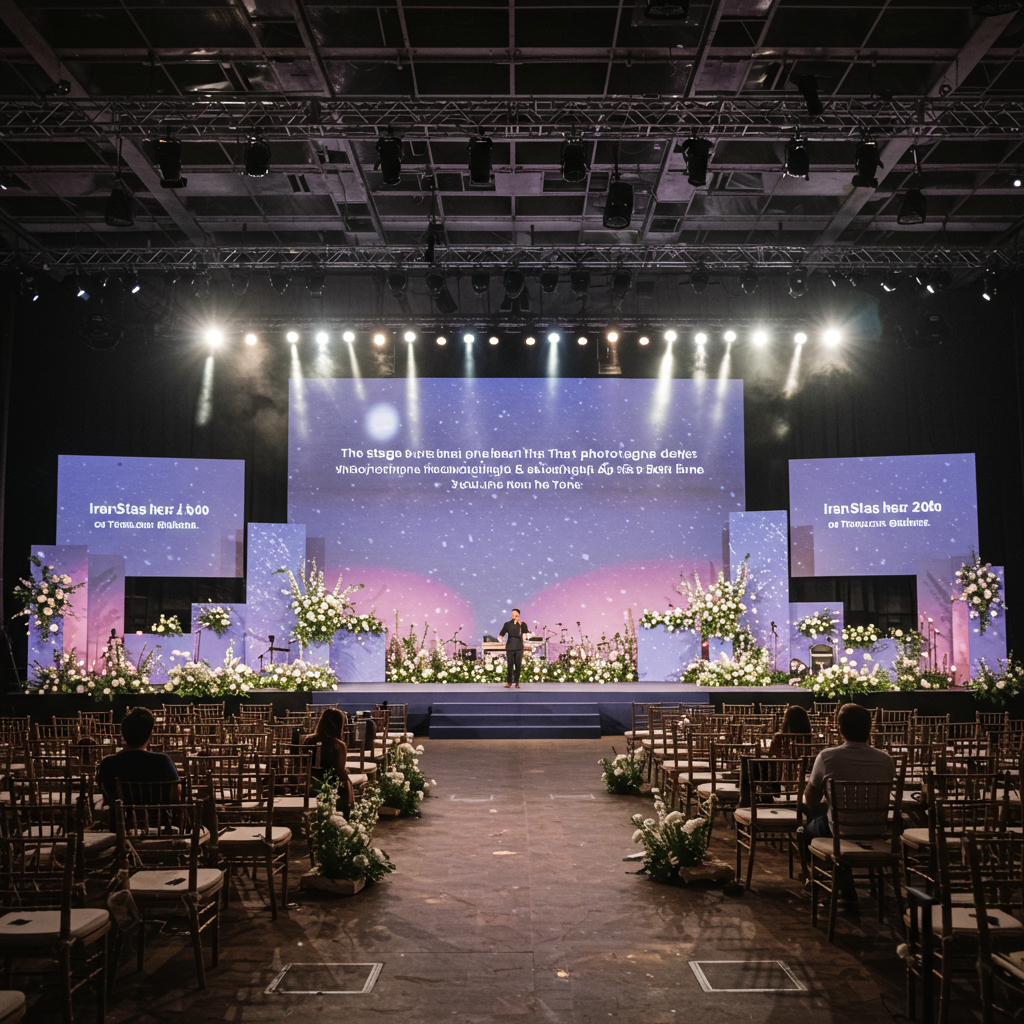
The boundary between a physical event and its digital echo has dissolved. Every conference, product launch, or concert is now a content creation opportunity, and the stage is its epicenter. A well-executed design does more than support a speaker; it tells a story, evokes emotion, and compels every attendee to become a brand ambassador. This is where strategic, photogenic stage design ideas become a non-negotiable component of event strategy. An event that photographs beautifully extends its reach exponentially, living on through social media feeds, press articles, and marketing materials long after the final curtain call. It is the silent partner in your communication, reinforcing your message and brand identity with every snapshot and video shared. The difference between a forgettable backdrop and an iconic, shareable set is not merely aesthetic—it’s a calculated decision with a direct impact on brand perception and marketing ROI.
Our methodology is rooted in a three-pronged approach: Artistry, Engineering, and Analytics. Artistry ensures the design is conceptually strong and emotionally resonant. Engineering guarantees it is safe, feasible, and technically flawless. Analytics provides the framework for measuring success. Key Performance Indicators (KPIs) are integrated from the outset, including audience engagement metrics (dwell time, interaction rates), social media analytics (hashtag usage, reach, impressions), and post-event surveys (NPS, brand recall). By quantifying the impact of design, we transform a creative expense into a measurable investment. This guide will walk you through each phase, providing the tools to plan, execute, and evaluate stage designs that are not just seen, but remembered and shared.
Vision, values and proposal
Focus on results and measurement
Our vision is to redefine stage design from a logistical necessity to a primary driver of brand engagement and marketing success. We believe that the most impactful designs are born at the intersection of creative vision and strategic objectives. Our core value is a commitment to data-driven creativity; every texture, color, and lighting cue is chosen not just for its beauty, but for its intended effect on the audience and its performance on camera. We apply the 80/20 principle by focusing our resources on high-impact visual elements—such as a central scenic piece, a unique lighting concept, or an interactive digital surface—that will generate the vast majority of photographic content. Our technical standards are uncompromising, adhering to IATSE labor practices, ETCP certification for rigging, and comprehensive structural engineering reviews for all scenic elements to ensure absolute safety and reliability.
- Strategic Alignment: We begin every project with a deep dive into your brand identity, event goals, and target audience to ensure the design is a true extension of your message.
- Camera-First Design: Our process prioritizes how the stage will appear through a lens. This includes meticulous planning for camera angles, lens compression, color temperature, and material reflectivity to avoid common photographic issues like glare, moiré patterns, and color washout.
- Measurable Impact: We build in measurement points from the start. This can range from integrating RFID scanners to track dwell time at interactive installations to providing social media monitoring reports that quantify the design’s digital footprint.
- Sustainability as a Standard: We prioritize modular designs, reusable materials, and energy-efficient LED lighting to minimize environmental impact without compromising on quality. Our goal is to achieve a 75% material reusability or recyclability rate on all projects.
Services, profiles and performance
Portfolio and professional profiles
We offer a full suite of services to bring your photogenic stage design ideas to life, from initial ideation to post-event breakdown. Our multidisciplinary team ensures a cohesive and seamless execution. The core team for any project includes a Creative Director, who translates brand goals into a visual concept; a Production Designer, who handles the technical drawings and material specifications; a Lighting Designer, who sculpts the space with light and shadow for maximum emotional and photographic impact; and a Production Manager, who oversees budget, timeline, and logistics. Our services are scalable, catering to everything from intimate product reveals to large-scale arena concerts.
Operational process
- Phase 1: Discovery & Strategy (1-2 weeks): Client workshops to define objectives, audience, brand guidelines, and KPIs. KPI: Client approval of Creative Brief with a score of 9/10 or higher.
- Phase 2: Concept & Design (2-4 weeks): Development of 2-3 initial concepts, presented as mood boards and preliminary sketches. Refinement of the chosen direction into 3D renderings and fly-through animations. KPI: Delivery of final 3D visuals with less than 10% client revision requests.
- Phase 3: Pre-Production & Engineering (3-6 weeks): Creation of detailed technical drawings (CAD), structural engineering validation, and material sourcing. Vendor selection and contract negotiation. KPI: Secure all key vendors and materials with a budget contingency of 15% remaining.
- Phase 4: Fabrication & Integration (4-8 weeks): Scenic elements are built, lighting and video equipment is prepped, and custom content is produced. KPI: 100% of manufacturing milestones met on or before deadline.
- Phase 5: On-Site Execution (3-10 days): Installation, rigging, focusing, and programming of all elements. Rehearsals and cue-to-cue technical run-throughs. KPI: Load-in and setup completed within the scheduled time, with zero safety incidents.
- Phase 6: Event & Post-Event (1-3 days): Live show operation, followed by efficient and safe teardown. Post-event reporting on KPIs. KPI: Achieve or exceed target social media engagement metrics by 20%.
Tables and examples
| Objective | Indicators | Actions | Expected result |
|---|---|---|---|
| Increase User-Generated Content (UGC) | Number of posts using event hashtag; Reach of UGC. | Design a dedicated, branded photo-op installation; Integrate interactive lighting that reacts to social media posts. | 3,000+ unique UGC posts over a 2-day event, reaching 1.5 million impressions. |
| Enhance Brand Perception | Post-event survey scores for “innovative,” “premium,” “engaging”; Press mentions. | Use high-end, unconventional materials; Commission a custom animated content package for LED surfaces. | A 15-point increase in brand perception scores; Mention of the stage design in >50% of media coverage. |
| Improve Audience Engagement | Dwell time at interactive zones; NPS survey feedback. | Create a multi-sensory environment with soundscapes and scent; Design walkways and breakout areas with unique visual appeal. | Average dwell time of 7 minutes at interactive installations; Overall event NPS of +50. |
Representation, campaigns and/or production
Professional development and management
The production phase is where vision becomes reality. Our production management is a science, built on rigorous planning and proactive problem-solving. This involves a complex logistical ballet of coordinating multiple vendors—from scenic manufacturing shops to A/V suppliers and trucking companies—often across different states or countries. We manage all necessary permitting, including fire marshal approvals for materials and egress plans, as well as structural engineering certifications for rigging and temporary structures. A master production calendar is the central nervous system of the project, tracking every dependency and milestone from the first deposit to the final truck leaving the venue. This meticulous management de-risks the project and ensures that creative intent is never compromised by logistical failure.
- Vendor Vetting Checklist: We maintain a roster of pre-vetted suppliers. Key criteria include a minimum of 5 years of industry experience, comprehensive insurance coverage ($5M minimum), a documented safety program, and positive references from at least three recent, comparable projects.
- Contingency Planning: For every critical component, we have a Plan B. This includes having backup projectors and servers on-site, pre-identified alternative material suppliers in case of a supply chain disruption, and weather contingency plans for all outdoor elements.
- Documentation and Communication: All communications are centralized through a project management platform. We conduct daily production meetings on-site and provide the client with a daily progress report, including photos and a summary of tasks completed, challenges encountered, and next steps.
- Safety as Priority One: A dedicated Safety Officer is present on all large-scale load-ins and load-outs. We conduct mandatory safety briefings each day, enforce PPE (Personal Protective Equipment) requirements, and ensure all work adheres to or exceeds local regulations and union rules.

Content and/or media that converts
Messages, formats and conversions: The Stage as Content
In a media-saturated world, the stage design itself must be the primary content. It’s not a backdrop for the content; it *is* the content. We design “moments” – specific visual compositions engineered for a 9:16 vertical video frame or a square Instagram post. These hooks are what transform passive viewers into active participants and content creators. We use principles of visual hierarchy, leading lines, and negative space to draw the eye and create compelling, balanced shots from any audience perspective. Call-to-actions (CTAs) are subtly integrated into the design, perhaps through a dynamic ticker on an LED screen prompting use of a hashtag, or a QR code embedded within a scenic element that leads to exclusive content. We A/B test digital content concepts in pre-visualization software to determine which color palettes and animations generate the most “wow” factor before committing to rendering. The ultimate conversion is when an attendee shares a photo of your stage, organically endorsing your brand to their entire network. This approach to crafting photogenic stage design ideas ensures the event’s visual identity is its most powerful marketing tool.
- Content Strategy Workshop: The creative team, marketing team, and client collaborate to define 3-5 key “shareable moments” for the event.
- Pre-visualization and Storyboarding: We create detailed storyboards and animated pre-visualizations showing how the stage will look from key camera positions (e.g., front of house, roving camera, keynote speaker’s point of view) during different segments of the event.
- Content Production: Our in-house or partner animators and videographers create custom content for all digital surfaces, optimized for the specific resolution and aspect ratio of the screens. This content is designed to complement, not compete with, the live presenters.
- Integration and Programming: The content is loaded into media servers, and a show programmer meticulously cues every transition, animation, and lighting change to sync perfectly with the event’s run of show.
- Post-Event Content Package: We provide the client with a package of high-resolution photos and b-roll video of the stage, optimized for use in future marketing campaigns, sizzle reels, and case studies.

Training and employability
Demand-oriented catalogue
To empower our clients and partners, we offer specialized training modules designed to bridge the gap between event planning and technical production. These workshops are tailored for corporate event teams, marketing departments, and aspiring production professionals, equipping them with the language and knowledge to commission and manage visually ambitious projects effectively. Our goal is to elevate the industry’s understanding of how strategic design can achieve business objectives.
- Module 1: The Creative Brief Masterclass. Learn how to write a brief that inspires designers and provides all necessary technical and strategic information, preventing costly misunderstandings down the line.
- Module 2: Lighting for the Camera. A hands-on introduction to the principles of three-point lighting, color temperature (Kelvin), CRI (Color Rendering Index), and how to light presenters and scenery to look their best on video.
- Module 3: Material Science for Events. An overview of common materials used in scenic fabrication (woods, metals, plastics, fabrics) and their properties, focusing on how they react to light and their suitability for photography.
- Module 4: Budgeting for Impact. Learn how to allocate your design budget effectively, understanding the relative costs of lighting, video, scenery, and labor to maximize visual impact.
- Module 5: Introduction to Media Servers. Understand the role of media servers like Disguise or Watchout in creating dynamic, multi-screen presentations and interactive content.
Methodology
Our training methodology is based on practical application. Each module combines theoretical instruction with real-world case studies and hands-on exercises. Participants are evaluated through a final project, such as developing a creative brief for a fictional event, which is then assessed using a detailed rubric. For more advanced courses, we facilitate internships and on-site shadowing opportunities on our projects, providing a direct pipeline to employability in the live events industry. We expect graduates of our comprehensive program to demonstrate a 50% improvement in their ability to develop effective project briefs and manage design budgets within a 10% variance.
Operational processes and quality standards
From request to execution
- Initial Inquiry & Diagnostic (24-48 hours): Receive client request. A senior producer conducts a 30-minute diagnostic call to understand core needs, budget range, and timeline. Deliverable: A summary of the call and a decision to proceed to the proposal stage.
- Proposal & Scoping (3-5 business days): Develop a detailed proposal including scope of work, initial creative thoughts, team bios, estimated budget, and timeline. Deliverable: Formal proposal document. Acceptance criterion: Client signature on the proposal and initial deposit.
- Kick-off & Pre-Production (Weeks 1-4): Formal project kick-off meeting. Begin the creative design and technical specification process as outlined in the Services section. Deliverable: Approved final design renderings and a locked production schedule.
- Execution & On-Site Management (Weeks 5-12+): Fabrication, integration, and on-site installation. Daily progress reports and rigorous quality control checks. Deliverable: A fully installed and tested stage environment. Acceptance Criteria: Successful completion of all technical rehearsals and client sign-off before doors open.
- Post-Event Analysis & Closure (Week 13): Event teardown, final budget reconciliation, and a post-mortem meeting. Delivery of a final report detailing KPI achievement and lessons learned. Deliverable: Final invoice and KPI report. Acceptance criterion: Final payment received.
Quality control
- Role-Based Approvals: The Creative Director must approve all aesthetic elements. The Production Manager must approve all budgetary items. The Technical Director must approve all engineering and safety plans.
- Peer Review System: All lighting plots and technical drawings are reviewed by a second, independent designer or technical director before being sent to vendors.
- Service Level Agreements (SLAs): Our client communication SLA guarantees a response to any query within 4 business hours. On-site, critical issues are escalated to the Production Manager and must have a proposed solution within 60 minutes.
- Acceptance Criteria: No scenic element is loaded in until it has passed a quality check at the manufacturing shop. The full stage is not handed over to the client until a comprehensive “cue-to-cue” rehearsal is completed without errors.
| Phase | Deliverables | Control indicators | Risks and Mitigation |
|---|---|---|---|
| Concept & Design | Mood boards, 3D renderings, floor plans. | Client satisfaction survey on design options (>8/10); Number of revision rounds (<3). | Risk: Creative misalignment. Mitigation: In-depth discovery workshop and frequent, structured client feedback sessions. |
| Pre-Production | CAD drawings, lighting plots, vendor contracts. | Engineering stamp of approval; All contracts signed 4 weeks prior to load-in. | Risk: Supply chain delays. Mitigation: Order long-lead items immediately upon design approval; identify backup material suppliers. |
| Fabrication | Finished scenic pieces, prepped equipment. | Weekly photo/video progress updates; Shop visits for quality checks. | Risk: Fabrication errors. Mitigation: Highly detailed construction drawings; mandatory QC check before shipping. |
| On-Site Execution | Fully functional stage. | Zero safety incidents; All deadlines met per production schedule; Budget variance <5%. | Risk: Venue limitations or labor issues. Mitigation: Thorough site survey early in the process; maintain excellent relationships with local union chapters. |
Cases and application scenarios
Case 1: “Future Forward” Global Tech Conference
Scope: A three-day conference for 5,000 software developers in a major convention center. The client wanted a main stage design that felt innovative, futuristic, and highly immersive, reinforcing their brand as a cutting-edge technology leader. The design needed to accommodate a variety of presentations, from single-speaker keynotes to multi-person panel discussions.
Development: We designed a 60-foot wide stage featuring a curved, high-resolution LED wall as the primary backdrop. This was flanked by custom-fabricated geometric “shards” with integrated LED lighting that could change color and intensity. The stage floor itself was a high-gloss black, creating crisp reflections that added depth for camera shots. A key feature was the “data stream” animated content package we created, which featured flowing lines of code and abstract data visualizations that moved across the main screen and onto the side shards, creating a cohesive and dynamic canvas. We worked closely with the broadcast director to ensure camera angles, lighting levels, and screen content were perfectly balanced to prevent moiré patterns and exposure issues.
KPIs and Results:
- Deadline: 16 weeks from contract to event.
- Social Media: The event hashtag #FutureForward2023 was used in over 12,000 unique posts on Twitter and Instagram, a 400% increase from the previous year. An analysis showed that 70% of photos shared featured the main stage.
- ROI/ADR: The client attributed a 25% increase in ticket pre-sales for the following year to the “buzz” and professional look of the event, with an estimated ROI on the stage design investment of 5:1.
- NPS: Attendee NPS score was +62, with “the amazing stage and production value” being the most frequently cited positive comment in the survey.
Case 2: “Ember” Music Festival Main Stage
Scope: The main stage for a three-day outdoor electronic music festival with an expected overnight audience of 20,000. The design needed to be visually spectacular, structurally robust to handle potential wind and rain, and flexible enough to meet the technical riders of 15 different headlining artists.
Development: Our concept was centered around a massive, 40-foot tall stylized phoenix structure made from laser-cut aluminum and semi-translucent panels. During the day, it was a striking sculpture. At night, it came alive with over 300 lighting fixtures and internal projection mapping, making the phoenix appear to breathe fire and smoke. The DJ booth was integrated into the phoenix’s base. The entire structure was built on a modular steel frame and required extensive engineering calculations and a multi-day build with heavy machinery. We provided each artist’s lighting designer with a 3D file of the stage in visualization software, allowing them to pre-program their shows to take full advantage of our unique design.
KPIs and Results:
- Deadline: 24 weeks for design, engineering, and manufacturing.
- Media Coverage: The stage was featured in major industry publications like DJ Mag and Mixmag, generating an estimated media value of over $500,000.
- Artist Feedback: Artist satisfaction surveys returned a 98% positive rating for the stage’s production capabilities and visual impact.
- Safety: The stage withstood a storm with 40 mph wind gusts on the second night with zero safety incidents, thanks to rigorous engineering and contingency planning.
Case 3: “Aura” Luxury Automotive Launch
Scope: An exclusive, invitation-only evening event to reveal a new electric luxury vehicle to 200 VIPs and members of the press. The environment needed to feel premium, sophisticated, and intimate, creating an aura of suspense and excitement for the reveal.
Development: We transformed a raw warehouse space into a theatrical environment. The guest journey was key. They entered through a tunnel of soft, glowing fabric walls. The main space was dominated by a circular stage, shrouded by a 360-degree sheer fabric curtain (a kabuki drop). Using projection mapping, we displayed abstract, ethereal light patterns onto the curtain. At the moment of the reveal, the kabuki dropped to the floor in a split second, revealing the car on a rotating platform under a single, dramatic spotlight. The surrounding walls were draped in black velvet to absorb light and focus all attention on the product. The material choices—velvet, silk, and polished chrome—were chosen for their luxurious feel and how they interacted with the theatrical lighting.
KPIs and Results:
- Deadline: 8 weeks from concept to execution.
- Press Mentions: The “dramatic reveal” was mentioned in 90% of the articles published about the event, with many including photos of the moment.
- Lead Generation: On-site vehicle pre-orders exceeded the client’s target by 50%.
- Client Satisfaction: The client rated the project 10/10 and signed a multi-year contract for future launch events.
Step-by-step guides and templates
Guide 1: Lighting Your Stage for Flawless Photos and Video
- Establish Your Key Light:This is your main, brightest light source. It should be placed approximately 45 degrees to the side and 45 degrees above your subject (the presenter). This creates a pleasing, dimensional look and avoids the flat, deer-in-the-headlights effect of direct front lighting.
- Add a Fill Light: Place a second, less intense light on the opposite side of the subject from the key light. Its purpose is to “fill in” the shadows created by the key light, reducing contrast. A good starting point is to set the fill light to about 50% of the intensity of the key light.
- Join Backlight: Place a third light behind the subject, high up and pointing down at their head and shoulders. This is crucial for video, as it separates the subject from the background, creating a sense of depth and preventing them from looking like a cardboard cutout. This is what creates that nice “halo” or rim of light.
- Light the Scenery Separately: Your background and scenic elements should have their own dedicated lighting. This allows you to control the mood and create visual interest independently of the presenter’s lighting. Use uplights for texture, gobos for patterns, and color washes to reinforce branding.
- Check Your Color Temperature: Ensure all your light sources are balanced to the same color temperature (measured in Kelvin). A mix of warm and cool sources will look jarring on camera. A standard for video is around 5600K (daylight balanced), but you can make creative choices as long as they are consistent. Use a camera’s white balance setting to match the lighting.
- Control Your Spill: Use barn doors, top hats, and grids on your lighting fixtures to control where the light goes. You don’t want your key light spilling onto your background screen, which would wash it out. Precision is key.
- Final Check with a Monitor: Don’t just trust your eyes. Look at the scene through a high-quality broadcast monitor. This will reveal issues with hotspots, flicker, or color balance that the naked eye might miss.
Guide 2: Checklist for Selecting Camera-Ready Materials
- Test for Reflectivity: Avoid large surfaces of highly glossy or metallic materials that can create uncontrollable specular highlights and lens flare. If you must use them, use them as accents. Opt for matte, satin, or eggshell finishes.
- Beware of Moiré: Avoid materials with very fine, tight, repeating patterns (like a fine herringbone or tight grid). These can create a distracting visual distortion on camera called a moiré pattern. Always test fabric and screen content with a camera beforehand.
- Consider Color and Contrast: Very bright whites can be difficult to expose correctly on camera without blowing out. Pure black can lose all detail and look like a void. It’s often better to use off-whites and dark grays. Ensure your scenic colors have enough contrast with your presenter to help them stand out.
- Think About Texture: Texture adds depth and visual interest on camera. Materials like raw wood, concrete, brushed metal, and heavy fabrics catch light beautifully and create subtle shadows that add dimension.
- Prioritize Durability and Safety: Ensure all materials are durable enough for the event environment and, most importantly, are flame retardant. Always request a Flame Certificate from your supplier.
Guide 3: Template for a Perfect Stage Design Creative Brief
- Section 1: The Big Picture. What is the event? Who is the audience? What is the primary message or feeling you want to convey?
- Section 2: Goals & KPIs. What does success look like? (e.g., “We want to generate 5,000 UGC posts,” “We need the brand to feel ‘innovative'”).
- Section 3: Brand Guidelines. Provide official logos, color palettes (with HEX/Pantone codes), and fonts. Include examples of what the brand “is” and “is not.”
- Section 4: Venue & Technical Specs. Provide the venue name, address, CAD drawings of the room, ceiling height, rigging points, and available power.
- Section 5: Run of Show. How will the stage be used? List the number of presenters, panel sizes, band setups, and any special moments like awards or reveals.
- Section 6: Inspirations & Mood Board. Include 5-10 images of other events, architecture, or art that capture the aesthetic you’re aiming for. This is a visual shortcut for the designer.
- Section 7: Budget & Timeline. Be transparent about your all-in budget for the design, fabrication, and A/V. Provide key dates for design approval, load-in, and the event itself.
Internal and external resources (without links)
Internal resources
- Proprietary Vendor Database with performance ratings.
- Template Library for Creative Briefs, Production Schedules, and Budgets.
- In-House CAD and 3D Model Library of common scenic and lighting elements.
- Post-Project Knowledge Base with lessons learned from over 200 events.
- Checklist for On-Site Safety and Compliance.
External reference resources
- ETCP (Entertainment Technician Certification Program) for personnel safety standards.
- OSHA Guidelines for General Industry and Construction.
- NFPA (National Fire Protection Association) codes, particularly NFPA 701 for fabric flame retardancy.
- Local IATSE (International Alliance of Theatrical Stage Employees) union regulations.
- Publications and organizations like Live Design, PLSN (Projection, Lights and Staging News), and ESTA (Entertainment Services and Technology Association).
Frequently asked questions
How much does a custom photogenic stage design cost?
Costs can vary dramatically based on scale, complexity, materials, and location. A simple but elegant design for a corporate breakout room might start around $15,000. A main stage for a large conference could range from $75,000 to $250,000+. A major festival or broadcast event can easily exceed $1,000,000. We provide detailed, line-item budgets and can design to a specific target cost.
How far in advance do I need to start the design process?
The more lead time, the better. For a large conference or complex build, we recommend starting the conversation 6-9 months in advance. This allows for proper creative development, engineering, and sourcing of materials without rush fees. For smaller designs, a 3-4 month lead time is a safe minimum.
Can you incorporate our existing A/V or streaming provider?
Absolutely. We are happy to collaborate with your chosen partners. We would initiate a technical call early in the process to ensure our designs are fully integrated with their equipment and capabilities, creating a seamless workflow between scenic, lighting, and video.
What is the most common mistake people make with stage design?
The most common mistake is poor lighting. A beautiful set can be completely ruined by flat, unflattering, or insufficient lighting. It’s the single most important element for creating mood, dimension, and ensuring everything and everyone looks great on camera. The second mistake is designing for the naked eye in the room, instead of for the camera lens.
How do you handle sustainability in your designs?
We prioritize sustainable practices by designing modularly, so scenic elements can be reconfigured and reused. We use low-VOC paints and sustainable wood products (FSC certified) whenever possible. We champion the use of energy-efficient LED lighting, which can reduce power consumption by up to 80% compared to traditional fixtures. We also work with local fabrication shops to reduce transportation emissions.
Conclusion and call to action
In the modern event landscape, your stage is your most powerful piece of content. It is the visual anchor for your message and the catalyst for digital amplification. By moving beyond simple backdrops and embracing a strategic, camera-first approach, you can create immersive experiences that captivate your live audience and engage a global one online. Investing in well-considered photogenic stage design ideas is not an expense; it is a direct investment in your brand’s reach, perception, and memorability. From driving a 400% increase in social media engagement to elevating attendee satisfaction scores, the data proves that great design delivers tangible results. The next time you plan an event, don’t just ask what the stage will look like—ask what it will do for your brand.
Glosario
- Gobo
- A small, stenciled disc placed inside a lighting fixture to project a pattern or image onto a surface.
- Truss
- A modular metal framework (usually aluminum or steel) used to build structures for hanging lights, speakers, and other equipment.
- LED Wall
- A large video screen made up of smaller panels (or tiles) of Light Emitting Diodes. They are known for their brightness and scalability to large sizes.
- Cyclorama (Cyc)
- A large, seamless curtain or wall, often curved at the bottom, used as a background for a stage. It is typically lit to create the illusion of a sky or an infinite space.
- Rigging
- The process and equipment used to safely suspend (or “fly”) truss, lighting, scenery, and other objects above the stage.
- Moiré Pattern
- A visual distortion that occurs in images and video when a scene contains fine, repetitive details that interfere with the camera’s sensor grid.
Internal links
- Click here👉 https://us.esinev.education/diplomas/
- Click here👉 https://us.esinev.education/masters/
External links
- Princeton University: https://www.princeton.edu
- Massachusetts Institute of Technology (MIT): https://www.mit.edu
- Harvard University: https://www.harvard.edu
- Stanford University: https://www.stanford.edu
- University of Pennsylvania: https://www.upenn.edu