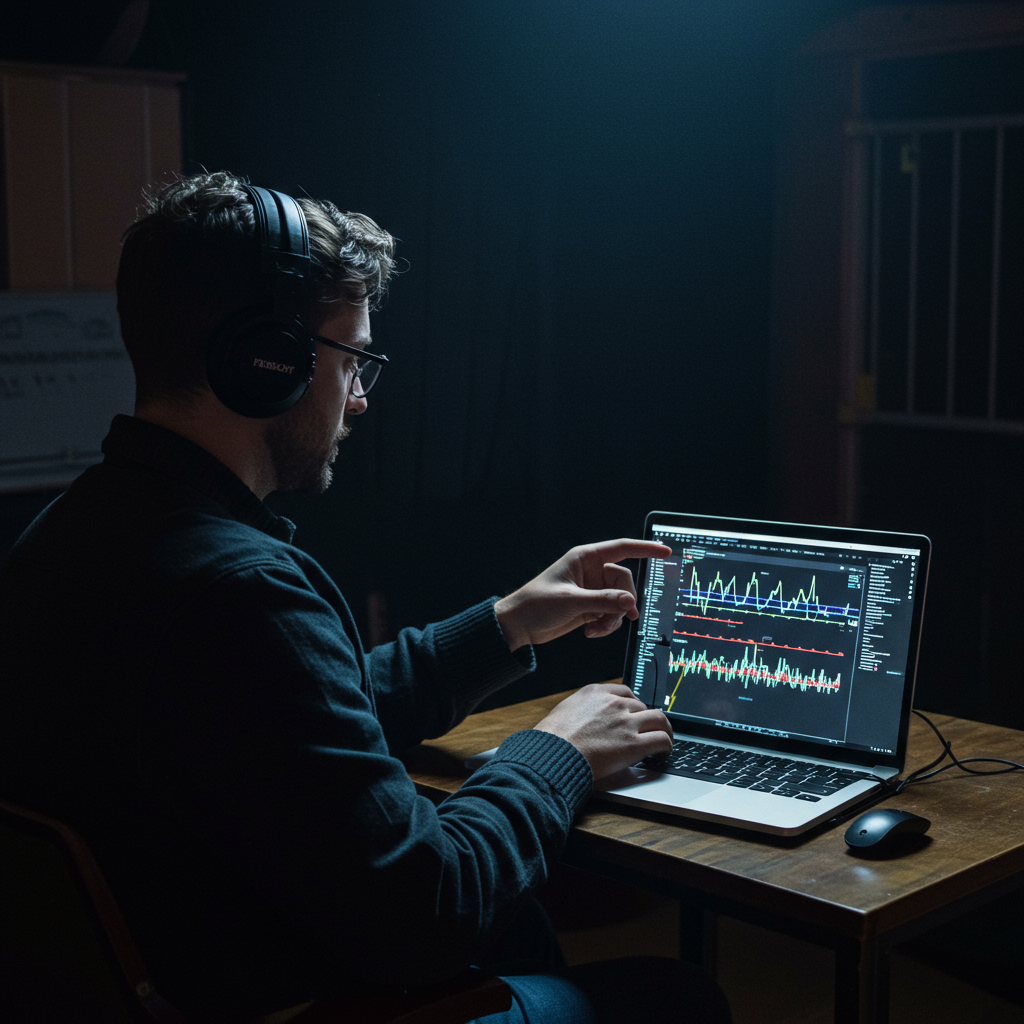
In any live event, broadcast, or recording session, audio quality is paramount. A single technical glitch can derail a performance, frustrate an audience, and damage a reputation. This guide provides a systematic, professional framework for the audio failure prevention sound check, a process that goes far beyond simply asking “check, one, two.” We will detail a proactive methodology designed for audio engineers, event producers, technicians, and even podcasters who demand flawless execution. By implementing these procedures, you can expect to achieve a significant reduction in critical failures (target: <1% incident rate), improve equipment uptime to over 98%, and see a measurable increase in audience or customer satisfaction scores (NPS). This article breaks down the vision, services, processes, and practical, step-by-step guides needed to turn potential audio disasters into predictable successes.
Introduction
Imagine the scene: the keynote speaker at a major corporate conference walks on stage to a round of applause. They approach the lectern, take a sip of water, and begin to speak… into a dead microphone. The silence is deafening, the technical scrambles, and the audience’s attention shifts from the message to the technical failure. This scenario, and countless others like it, are almost always avoidable. They are the direct result of an incomplete or rushed pre-event verification process. An effective audio failure prevention sound check is the single most critical procedure for ensuring a smooth, professional production. It’s an insurance policy against embarrassment and a testament to technical excellence. This is not merely about checking if a microphone works; it’s a holistic diagnosis of the entire signal chain, from the power source to the speaker cone, designed to identify and mitigate points of failure before they become critical.
This article outlines a comprehensive methodology for conducting such a check. We will explore the core principles, define auditable processes, and provide actionable checklists and templates. Success will be measured through key performance indicators (KPIs) such as the reduction in mid-event technical issues (targeting a <2% failure rate), efficiency gains in setup time (aiming for a 15% reduction), and improved client satisfaction metrics. By adopting this structured approach, technical teams can move from a reactive, “firefighting” mode to a proactive, quality assurance mindset, delivering consistent and reliable audio every time.
Vision, values and proposal
Focus on results and measurement
Our vision is to elevate the standard of audio production by embedding a culture of proactive prevention. We believe that excellence in audio is not an accident but the result of deliberate, meticulous preparation. Our core values—Reliability, Precision, and Professionalism—drive every step of our process. We apply the 80/20 principle, focusing our primary efforts on the 20% of issues that cause 80% of all audio failures: faulty cables, improper gain staging, radio frequency (RF) interference, and power instability. Our procedures are aligned with established industry standards, including AES (Audio Engineering Society) guidelines for connectivity and EBU R 128 for broadcast loudness, ensuring both technical integrity and regulatory compliance.
- Reliability Value: Every component is tested, and every potential failure point is considered, leading to a near-zero rate of preventable errors.
- Quality Criterion: Audio clarity is not subjective. We measure signal-to-noise ratio (target > 60 dB), frequency response, and dynamic range to guarantee objective quality.
- Decision Matrix: The depth of the sound check is scaled to the event’s complexity. A simple panel discussion might require a 30-minute check, while a multi-stage music festival demands a multi-day, multi-team system verification. The decision is based on factors like input count, audience size, and broadcast requirements.
- Proactive Mindset: We don’t just ask “Does it work?” We ask, “How could it fail, and what is our backup plan?”
Services, profiles and performance
Portfolio and professional profiles
We offer specialized services built around the core principle of proactive audio management. These services are designed to support a wide range of events, ensuring a successful outcome through a rigorous audio failure prevention sound check methodology. Our team consists of highly skilled professionals with defined roles and responsibilities.
- Pre-Event Audio System Audits: A comprehensive review of technical riders, venue schematics, and equipment lists to identify potential issues before any gear arrives on site.
- Live Event Audio Engineering (A1/A2): Deployment of lead (A1) and assistant (A2) engineers who execute the setup, sound check, and live mixing of the event.
- RF Coordination & Management: A dedicated RF technician who scans the wireless spectrum, assigns interference-free frequencies, and monitors wireless performance throughout the event.
- Broadcast Audio Consultation: Ensuring the audio feed for streaming or television broadcast meets strict loudness (EBU R 128) and quality standards, with full redundancy.
Operational process
-
- Phase 1: Briefing and Analysis (KPI: 100% Rider Compliance): We review all client requirements, technical riders, and venue limitations.
- Phase 2: System Design (KPI: <5% On-site Design Deviation): A detailed audio system diagram, input list, and power plan is created.
- Phase 3: Deployment and Connection (KPI: Setup time vs. schedule <10% variance): The physical setup of all equipment as per the design.
- Phase 4: Verification and Sound Check (KPI: 100% of signal paths tested): The core audio failure prevention sound check is performed, from line check to full system tuning.
- Phase 5: Operation and Monitoring (KPI: <1 Critical Failure per 8-hour event): Live operation with constant monitoring of all critical systems.
Phase 6: Post-Event Report (KPI: Report delivered within 48 hours): A summary of performance, including any issues encountered and resolved.
Tables and Examples
Ensure Stage Gain OptimalAverage input level of -18 dBFS at the digital consoleSystematic preamplifier adjustment for each input during line testing.Maximum dynamic range, minimum background noise, and no signal clipping.Ensure playback redundancy.Failover switchover < 200 ms.Configure an identical primary and backup playback system with an automatic switcher.Continuity of background music or backing tracks even if the main system fails.Prevent feedback problems.Gain before feedback > 6 dB above the operating level.”Ringing out” of the monitors and PA speakers using a graphic/parametric equalizer.Clear and powerful sound without feedback squeals.
| Objective | Indicators | Actions | Expected Result |
|---|---|---|---|
| Eliminate RF Interference | Signal-to-Noise Ratio > 30 dB on all wireless channels | Spectrum Scanning, Intermodal Frequency Calculation, Transmitter Run Testing. | Zero Wireless Audio Signal Loss During the Event. |
Representation, campaigns and/or production
Professional development and management
Effective production management is the logistical backbone of any successful audio setup. This involves more than just plugging in cables; it requires meticulous planning, coordination with other departments (lighting, video, staging), and robust contingency planning. We manage all aspects of audio production, from sourcing and verifying equipment from rental vendors to creating detailed schedules that integrate audio checks into the overall event timeline. We ensure all necessary permits and licenses, such as those for RF spectrum usage, are secured well in advance. Our process is designed to de-risk the entire production by anticipating problems before they occur.
- Power Contingency Plan: All critical audio consoles and network equipment are on uninterruptible power supplies (UPS). The connection to a backup generator is identified.Critical Equipment Redundancy: An identical spare vocal microphone (wired), a backup playback system, and key spare cables (HDMI, XLR, etherCON) are specified and readily available.
Clear Documentation: Updated system diagrams, entry lists, and stage diagrams are distributed to all relevant personnel prior to arrival on site.
Supplier Verification: Rental equipment is tested at the supplier’s warehouse prior to shipment to identify any defective equipment (DOA – Dead On Arrival).
Communication Protocols: Clear radio communication channels are established between A1 (FOH), A2 (Stage), and the Production Manager for rapid troubleshooting.
figure
img src=”__PLACEHOLDER_IMG_PRODUCCION__.jpg” alt=”A stage plot diagram and an input list on a clipboard at a Front of House position.”>
Detailed documentation like stage plots and input lists are non-negotiable tools that minimize confusion and streamline the setup process.
Content and/or media that converts
Messages, formats and conversions: Documentation as a prevention tool
In audio production, the “content that converts” isn’t a marketing message, but the technical documentation that converts a complex plan into a flawlessly executed reality. Clear, concise, and standardized documents like input lists, stage plots, and system diagrams are the primary tools for preventing miscommunication—a major source of audio failures. A well-designed input list ensures every microphone is patched correctly; A clear stage plot tells the stagehands exactly where to place every monitor and microphone stand. This systematic approach to documentation is a core part of our audio failure prevention sound check strategy, as it ensures accuracy long before the first fader is pushed. We use A/B testing on our documentation formats to determine which layouts lead to the fewest on-site patching errors, optimizing for clarity and speed.
- Creating the Initial Draft: The A1 collaborates with the client or band leader to create a preliminary entry list and stage diagram.
- Technical Review: The draft is distributed to the audio team, production manager, and department heads for review and identification of conflicts or limitations.
- Version 1.0 – For the Breakdown: A finalized version is issued for pre-planning, equipment allocation, and manpower booking.
- On-Site Review: Upon arrival, the document is used as the “source of truth” for physical patching. Any deviations are noted.
- As-Built Documentation: After the event, a final version of the document is updated to reflect the actual setup, serving as a valuable reference for future events.

Training and Employability
Catalog geared towards demand
To foster a new generation of highly competent audio professionals, we have developed a training curriculum focused on practical, real-world skills that are in high demand. Our modules go beyond basic theory to instill the problem-solving mindset required for high-stakes environments.
Module 1: Signal Chain Fundamentals and Gain Stages: A hands-on course on how to optimize audio signal flow for maximum fidelity and minimum noise.
Module 2: RF Coordination for Harsh Environments: Learn how to use spectrum analyzers and coordination software to ensure uninterrupted wireless performance.
Module 3: The Systematic Sound Test Protocol for Audio Fault Prevention: Our flagship course, detailing the complete system verification process.
Module 4: Advanced Troubleshooting Techniques: Simulated fault scenarios (ground loops, Dante network faults, phantom power issues) with exercises Timed resolution.
Module 5: Digital Audio Networking (Dante Level 1 and 2): Certification in the industry standard for audio transport over IP.
Module 6: Effective Communication in Production: How to communicate clearly and concisely with artists, directors, and other team members under pressure.
Methodology
Our training methodology is based on a “learn, do, teach” model. Students first learn the theory, then perform the tasks in a hands-on lab environment, and finally are tasked with explaining the concept to a peer. Performance is not graded on a curve but evaluated against a professional standard rubric. Successful completion of our advanced modules includes placement assistance and access to our professional network, as we are confident that our graduates possess the skills necessary to excel from day one.
Operational Processes and Quality Standards
From Request to Execution
Our operational pipeline is a structured workflow that ensures quality control at every stage of a project. Each phase has specific deliverables and acceptance criteria, ensuring that nothing is left to chance.
- Initial Diagnosis: Upon receiving a request, we conduct a discovery call to understand the objectives, scope, and constraints. Deliverable: Project summary.
- Proposal and Design: We create a detailed equipment list, a labor budget, and a preliminary system diagram. Deliverable: Technical and financial proposal. Acceptance Criteria: Client Approval.
- Pre-Production: Once approved, we finalize all technical documents, coordinate logistics, and confirm staffing. Deliverable: Final production package (ticket list, stage diagram, RF plan).
- On-Site Execution: Includes loading, setup, soundcheck for audio failure prevention, and show operation. Deliverable: A flawlessly executed audio event.
- Closure and Review: Equipment dismantling, inventory record, and a post-event report detailing system performance and lessons learned. Deliverable: Post-event report. Acceptance Criteria: Final invoice paid.
-
Quality Control
- Defined Roles: A1 is ultimately responsible for audio quality. A2 performs tasks on stage and reports to A1. The RF technician exclusively manages wireless systems.
- Problem Escalation: Non-critical problems are resolved at the team level. Critical issues that could affect the show are immediately escalated to the Production Manager.
- Acceptance Indicators: A soundcheck is not considered complete until 100% of the inputs and outputs have been verified, the system’s background noise is below -85 dBu, and the system is feedback-free at the intended operating levels.
- Service Level Agreements (SLAs): We commit to a response time of less than 60 seconds for any critical audio issues reported during a live event.
All documents are complete, peer-reviewed, and distributed 72 hours prior to upload.Risk: Last-minute changes by the artist. Mitigation: Include “spare” channels in the input list; bring additional equipment (microphones, DI boxes).Setup: Audio system fully patched and powered on.100% of physical connections match the system diagram. AC voltage verified.Risk: Defective equipment (DOA). Mitigation: 10% spares are required for critical cables; Key components are tested before loading.Sound CheckSystem tuned and ready for the show.Signal confirmed at every input and output. Stable RF levels. Feedback-free monitors.Risk: Unforeseen RF interference (e.g., from video equipment). Mitigation: Perform a new RF scan after all production equipment is powered on.OperationConsistent, high-quality audio mix.Mix levels are maintained within targets (+/- 3 dB). Zero audio failures.Risk: Component failure during the show. Mitigation: Redundant signal paths for critical inputs; backup consoles and playback systems ready.
Phase Deliverables Control Indicators Risks and Mitigation Pre-production Input List, Stage Diagram, Plan of RF
Application Cases and Scenarios
Case 1: High-Level Corporate Conference
Scenario: A three-day event for 500 executives with a keynote speaker, multiple panel discussions, and Q&A sessions, all broadcast live. The main challenge was 16 wireless lavalier microphones operating simultaneously in a downtown hotel, a notoriously RF-saturated environment.
Process: Our team conducted an on-site RF scan one week in advance to identify local television channels and other sources of interference. A frequency plan was designed using professional software (Shure Wireless Workbench) to calculate intermodulation-free frequencies. Directional antennas (LPDA) were used to enhance reception and were strategically positioned to maintain line of sight with the presenters. A strict battery management protocol was implemented, with fresh batteries provided for each presenter.
Results: During the three days of the event, there was not a single wireless audio signal loss. The audio quality of the live stream was rated 9.8/10 in viewer feedback surveys. The “zero critical audio failures” KPI was met, and the client highlighted audio reliability as a key factor in the event’s success. The return on investment was evident in the reduction of post-event complaints and an improved reputation.
Case 2: Outdoor Music Festival
Setting: A one-day music festival with 10 bands on a single stage, with 20-minute changeovers between performances. The challenge was the speed and precision required to reconfigure the stage for each band without delays while maintaining consistent audio quality for an audience of 5,000.
Process: The key was thorough pre-production. We collected and verified stage diagrams and setlists for each band a month in advance. Digital console scenes were created and saved for each band, pre-loading routings, channel labels, and basic EQ/dynamics settings. A split digital audio snake was used, feeding identical consoles at FOH and the monitors to allow for independent operation. A three-person patching team with clearly defined roles was created on stage to execute the changes.
Results: The average changeover time was reduced to 15 minutes, 25% faster than the target of 20 minutes. The festival ran as planned, with no audio-related technical delays. The KPI of “technical downtime < 5 minutes per changeover” was significantly exceeded. The visiting bands’ engineers praised the organization and efficiency of the in-house audio team.
Case 3: Immersive Sound Theater Production
Scenario: A new theater production scheduled for 80 performances, using a complex immersive sound system with 48 speakers and 24 wireless microphones for the actors. The challenge was to ensure absolute reliability and consistency night after night. A single microphone or speaker failure could ruin a scene.
Process: We developed a rigorous daily soundcheck protocol. This 45-minute process, performed before each performance, included: a health check of each of the 48 loudspeakers using pink noise and an RTA; a battery and functionality check of each wireless microphone; and a verification of the integrity of the digital audio network. A detailed log was kept, noting battery life, microphone element cleanliness, and any anomalies.
Results: Over the 80 performances, a 99.8% success rate was recorded with no audio-related interruptions to the show. Two potential issues (a degraded microphone element and an amplifier showing signs of overheating) were identified and resolved during the daily checks before they could affect a performance. The KPI of “audio level consistency < 1.5 dB variation” between functions was maintained, providing an identical experience for the audience every night.
Case 4: Live Streaming of an Esports Event
Scenario: An esports championship with 10 players, 2 commentators, and an analysis team, all streamed to a global audience of over 100,000 viewers. The challenge was the complexity of the multiple audio sources (game audio, player voices, commentators, analysts, pre-recorded videos) and the need for complete redundancy for the broadcast.
Process: A “mirrored” redundancy audio system was designed. Two identical digital consoles received the same inputs via analog and digital splitters. If the main console failed, an automatic switching system would switch to the backup console output in less than 100 milliseconds. All consoles, network switches, and transmission equipment were powered via two separate power circuits, each backed up by a UPS. A full line test was performed with the transmission truck 4 hours prior to the broadcast, verifying each of the 64 audio feeds.
Results: The 10-hour broadcast was completed without any audio issues. During a brief power outage on-site, the UPS systems kept all audio equipment online without interruption. The broadcast mix met the streaming platform’s (LKFS) stringent loudness standards, avoiding a normalization penalty. The KPI of “100% Audio Signal Uptime” was achieved, solidifying the event’s reputation for high-quality production.
Step-by-Step Guides and Templates
Guide 1: The 12-Point Soundcheck Checklist for Small to Medium-Sized Events
This guide is designed for a single engineer preparing a PA system for a band or corporate presentation.
- AC Power Verification: Confirm that all power outlets provide the correct voltage (e.g., 120V/230V) and that the circuits are not overloaded.
- Physical Inspection: Visually inspect each speaker, cable, and component. Look for obvious damage. Ensure the speakers are securely positioned and angled.System Connection: Connect the entire system with the console faders and amplifiers turned down.
Sequential Power-On: Power on the equipment in the order of signal flow: sources (players, microphones), mixing console, and finally, amplifiers or powered speakers.
Background Noise Check: Raise the main faders. The system should be quiet. If there is any buzzing or hissing, fix the problem now.
Line Test: Have someone speak into each microphone (“Test, One, Two”) and play a signal from a DI/playback source. Confirm that the signal is reaching the correct channel on the console. This is the most fundamental step in the audio failure prevention sound check.
Gain Structure: For each input, adjust the preamplifier (“gain” or “trim”) so that the signal averages around -18 dBFS (digital) or 0 VU (analog).
Speaker and Monitor Testing: Send pink noise through the system to confirm that all speaker components (woofers, tweeters) are functioning.
Monitor Ringing Out: Slowly increase the level of each microphone on its respective monitor until you begin to hear feedback. Use an equalizer to precisely cut the frequency that’s feeding back.
Creating Monitor Mixes: Work with the artists to create a monitor mix that’s comfortable for each of them.
Equalizing the Front of House (FOH): Play a well-mixed track that you’re familiar with and adjust the main system’s EQ so it sounds balanced in the room.
Final Soundcheck with the Artists: Have the artists perform a complete song. Ajuste los niveles, la ecualización y los efectos para crear la mezcla final.
Guía 2: El proceso de coordinación de RF en 6 pasos
Para cualquier evento con más de 3-4 sistemas inalámbricos.
- Investigación previa: Utilice bases de datos en línea para determinar qué canales de televisión digital están activos en la ubicación del evento. Evite estas frecuencias.
- Escaneo del espectro en el lugar: Utilice un analizador de espectro o la función de escaneo de un receptor inalámbrico de alta gama para escanear el entorno de RF real con todo el demás equipo de producción (especialmente las paredes de video LED) encendido.
- Cálculo de frecuencias: Importe los datos del escaneo en un software de coordinación (por ejemplo, Shure WWB, Sennheiser WSM). Este software calculará un conjunto de frecuencias que no solo están libres de interferencias externas, sino que tampoco interferirán entre sí (intermodulación).
- Programación y etiquetado: Programe cada transmisor y receptor con las frecuencias asignadas. Etiquete claramente cada unidad con el nombre del canal/artista.
- Prueba de recorrido: Haga que una persona camine por toda el área de actuación con cada transmisor encendido, mientras otra persona monitorea la recepción de RF y la calidad del audio en el receptor. Busque zonas muertas.
- Monitoreo durante el espectáculo: Durante el evento, mantenga el software de coordinación en funcionamiento para monitorear la intensidad de la señal de RF y la vida útil de la batería de cada transmisor en tiempo real.
Guía 3: Plantilla de solución de problemas de audio comunes
Un marco mental para diagnosticar problemas rápidamente bajo presión.
| Síntoma | Causas probables (en orden) | Soluciones paso a paso |
|---|---|---|
| Sin sonido de un micrófono | 1. Silenciado. 2. Cable defectuoso. 3. Sin alimentación fantasma (si es necesario). 4. Preamplificador bajo. | 1. Compruebe el botón de silencio del canal. 2. Compruebe la asignación a la mezcla principal. 3. Cambie el cable XLR. 4. Active la alimentación fantasma (+48V). 5. Suba la ganancia. 6. Cambie el micrófono. |
| Zumbido o silbido fuerte (60/50 Hz) | 1. Bucle de masa. 2. Cable no balanceado cerca de cables de alimentación. | 1. Utilice un aislador de bucle de masa o un DI box con interruptor de levantamiento de tierra (ground lift). 2. Cruce los cables de audio y de alimentación a 90 grados, no los coloque en paralelo. |
| Retroalimentación (chillido agudo) | 1. Micrófono demasiado cerca del altavoz. 2. Demasiada ganancia. 3. Nivel del monitor demasiado alto. | 1. Aleje el micrófono del altavoz o el altavoz del micrófono. 2. Baje el fader del canal. 3. Identifique la frecuencia de la retroalimentación con un analizador y córtela en el ecualizador (gráfico o paramétrico). |
| Sonido distorsionado/recortado | 1. Ganancia del preamplificador demasiado alta. 2. Fuente de señal demasiado alta (por ejemplo, salida del teléfono al máximo). | 1. Baje el ajuste de ganancia/trim del canal. 2. Active el pad del canal si está disponible. 3. Baje el nivel de la fuente. |
Recursos internos y externos (sin enlaces)
Recursos internos
- Plantilla de lista de entradas estándar (Hoja de cálculo de Google)
- Creador de diagramas de escenario (Software Visio/Draw.io)
- Lista de comprobación de prueba de sonido previa al evento (Formulario PDF)
- Informe de calidad de audio post-evento (Plantilla de Word)
- Biblioteca de archivos de configuración de consolas para modelos comunes (Yamaha, DiGiCo, Behringer)
Recursos externos de referencia
- Estándares de la Audio Engineering Society (AES) para la interconexión de audio profesional
- Guías de mejores prácticas de Shure para la coordinación de RF
- Recomendación EBU R 128 – Normalización de la sonoridad y nivel máximo permitido de audio
- SynAudCon (Audio Contractor Síncrono) – Materiales de formación sobre el diseño de sistemas de sonido
- El manual de Yamaha Sound Reinforcement Handbook
Preguntas frecuentes
¿Cuánto tiempo debe durar una prueba de sonido adecuada?
Varía drásticamente con la complejidad. Una prueba de sonido para un solo orador en un podio puede durar 15 minutos. Para una banda de 5 miembros en un club, se necesitan al menos 60-90 minutos. Para un escenario de festival o una producción a gran escala, el proceso de prueba del sistema y la prueba de sonido puede llevar de 4 a 8 horas o más.
¿Cuál es la parte más pasada por alto de una prueba de sonido?
La estructura de ganancia. Muchos ingenieros novatos compensan una ganancia de preamplificador baja simplemente subiendo el fader, lo que eleva el ruido de fondo. Otros ajustan la ganancia demasiado alta, lo que provoca recortes y distorsión. Lograr una estructura de ganancia óptima en cada etapa de la cadena de señal es la base de una mezcla limpia y dinámica.
¿Una “prueba de línea” es lo mismo que una “prueba de sonido”?
No. Una prueba de línea es un subconjunto de la prueba de sonido. Su único propósito es verificar la conectividad: confirmar que la señal del micrófono 1 en el escenario llega al canal 1 de la consola. Una prueba de sonido es el proceso completo que incluye la prueba de línea, pero también el ajuste de los niveles, la ecualización, la dinámica, los efectos y las mezclas de monitores.
¿Cómo puedo evitar las pérdidas de señal de los micrófonos inalámbricos?
La prevención se basa en tres pilares: 1) Coordinación de frecuencias adecuada utilizando un software y un escaneo en el lugar. 2) Mantener una línea de visión clara entre las antenas del transmisor y del receptor. 3) Gestión estricta de las baterías: utilice siempre baterías nuevas o recién cargadas de alta calidad y conozca su vida útil real.
¿Qué equipo es esencial para realizar una prueba de sonido eficaz para la prevención de fallos de audio?
Más allá de lo obvio (consola, micrófonos, altavoces), una herramienta indispensable es un buen par de auriculares de calidad de estudio. Le permiten aislar canales individuales y escuchar problemas sutiles como zumbidos, siseos o distorsiones que podrían perderse en el ruido de la sala. Un simple comprobador de cables XLR también es invaluable para diagnosticar rápidamente los cables defectuosos.
Conclusión y llamada a la acción
La excelencia en el audio profesional no es un arte misterioso, sino el resultado de una ingeniería disciplinada y una preparación metódica. Al transformar la prueba de sonido de una rápida comprobación de funciones en un exhaustivo proceso de diagnóstico, pasamos de ser técnicos reactivos a ingenieros proactivos. Un audio failure prevention sound check sistemático es la piedra angular de esta filosofía. Reduce drásticamente la probabilidad de fallos técnicos, mejora la calidad del producto final, aumenta la eficiencia y, en última instancia, genera confianza tanto en los clientes como en el público. Los KPIs no mienten: una menor tasa de fallos, una mayor satisfacción del cliente y unas operaciones más fluidas son los resultados directos de invertir tiempo en la preparación.
No deje su próximo evento al azar. Adopte el enfoque estructurado que se detalla en esta guía. Implemente las listas de comprobación, utilice la documentación adecuada y cultive una mentalidad de prevención. Empiece poco a poco, aplicando la lista de comprobación de 12 puntos a su próximo proyecto. Experimente la confianza y la calma que se derivan de saber que ha anticipado y mitigado todos los puntos de fallo previsibles. Este es el camino hacia una producción de audio impecable y sin estrés.
Glosario
- Gain Staging
- El proceso de ajustar el nivel de una señal de audio en cada punto de la cadena de señal para garantizar el máximo rango dinámico y la mínima distorsión y ruido.
- DI Box (Direct Input Box)
- Un dispositivo que convierte una señal no balanceada de alta impedancia (como la de una guitarra eléctrica) en una señal balanceada de baja impedancia adecuada para conectarla a una entrada de micrófono en una consola de mezclas. A menudo incluye un interruptor de levantamiento de tierra.
- RF (Radio Frequency)
- La porción del espectro electromagnético utilizada por los sistemas de micrófonos y monitores inalámbricos para transmitir audio por el aire.
- FOH (Front of House)
- El término se refiere tanto a la posición de mezcla principal (donde se encuentra el ingeniero de audio que mezcla para el público) como al propio sistema de altavoces principal que se dirige al público.
- Monitor Wedge
- Un altavoz, normalmente en forma de cuña, que se coloca en el escenario y se dirige a un artista para que pueda oírse a sí mismo y a los demás miembros de la banda.
- Phantom Power
- Un voltaje de CC (normalmente +48V) que se envía a través de un cable de micrófono XLR para alimentar los componentes electrónicos activos de los micrófonos de condensador y las DI box activas.
Internal links
- Click here👉 https://us.esinev.education/diplomas/
- Click here👉 https://us.esinev.education/masters/
External links
- Princeton University: https://www.princeton.edu
- Massachusetts Institute of Technology (MIT): https://www.mit.edu
- Harvard University: https://www.harvard.edu
- Stanford University: https://www.stanford.edu
- University of Pennsylvania: https://www.upenn.edu